Friday, July 17, 2015

Oversized Congrats Card with Vintage-Shabby Patina Flowers

In celebration of a friend's college graduation, I made my first 6"x6" card with some elements that I had not added, nor created, prior to this one.  Cricut cartridges, Sizzix dies/embosslits, and punches created the die-cuts, and time became my best friend in this card's development process, as I dyed and scrunched flowers, twisted gold cardstock to make corkscrews, embellished and sponged elements, and added a monogram "D" to customize the overall piece to the recipient's first name.  My goal was to add a variety of components, dimension, and layers to convert the appearance of the card to one that would deliver an interactive experience.

CHALLENGES/LINKS
Craft and Smash:  Sentiments
Let's Craft and Create:  #103 Butterflies or Birds (I added both.)
Petal Lu:  Anything Goes, Featuring "That Craft Place"
Crafty Hazelnut's Patterned Paper:  July Challenge

INGREDIENTS
Papers:  Mud Pie CS (Bazzil Basics Christmas Stack made for My Mind's Eye Signature Christmas Collection) Union Square DSP Stack (Recollection), Soft Suede CS (Stampin' Up!), Ivory CS (Staples, #110), Elegant Soiree DSP (Stampin' Up!), Dark Brown CS Scrap (Source Unknown), Gold CS (Recollections), Caramel Brown CS Scrap (Source Unknown).
Inks:  Soft Suede (Stampin' Up!), Gold Pigment (ColorBox), Chocolate Chip (Stampin' Up!), Baja Blue (Stampin' Up!), Not Quite Navy (Stampin' Up!), Detail Gold Emboss Powder (Personal Stamp Exchange), Early Espresso (Stampin' Up!), Close to Cocoa (Stampin' Up!), Gold Dazzle Pen (Stampin' Up!).
Stamps:  French Foliage (Stampin' Up!), Silhouette Sentiments (Stampin' Up!), Carte Postale (Stampin' Up!).
Punches:  2-Step Bird (Stampin' Up!), Corrugator (Stampin' Up!).
Cuttlebug/Big Shot:  Beautiful Wings Embosslits (Sizzix for Stampin' Up!), Square Lattice Emboss Folder (Sizzix for Stampin' Up!),
Cricut:  Sophisticated by Teresa Collins, Picturesque, Cindy Loo.
Embellishments: Antique Copper Brads (Making Memories).

Saturday, June 20, 2015

Eiffel Tower and Floral Baroque Congrats Gold Card


This card's core was fundamentally quite basic compared to the end result.  I had made a large quantity of the original piece, in an array of colors, to send to Operation Write Home and kept some on-hand for surprise occasions.  The "core card" was originally based upon one that I had received.  You may see the other card by visiting my post:  "Sandi MacIver-Inspired: Eiffel Tower Medallion Card "

Starting with the core card, I pulled off the medallion, re-worked the entire project, and explored new ways to use Ranger Ink's "Glossy Accents," versus how I used the product in my last project.  I documented my new uses of this product in my last post:  Flying Insect Collection in the Spring Garden Card

Specific to this "Congrats" card, I used glossy accents even more; this are the applications and techniques for which the product was enjoyed:  adhering, sealing, coating, blending colors, creating shine, dimension, and texture, embellishing, attaching, and as an insurance policy--because, sometimes, adhesive gems lose their stickiness, and "Glossy Accents" ensures that tiny things remain attached. 

Currently, "Glossy Accents" exists as my favorite product.  It has expanded my crafting world and incrementally increased my mixed-media confidence.  This products has made me feel much more proud of the cards I have made, and the one pictured above was finished late yesterday without any particular challenge in-mind.  Late last night, as I was working on this blog post and searching for challenges, I became excited when I learned that Simon Says Stamp Blog's "Wednesday Challenge" was featuring Ranger's "Glossy Accents"--my timing could not have been more perfect--and it perfectly worked with the anniversary of the Mixed Media Monthly Challenge #13, too!  Below, please find a complete list of challenges, into which I submitted my card

CHALLENGES
Mixed Media Monthly Challenge #13 A Year of Choices and Some Changes
Simon Says Stamp Wednesday Challenge Use Your Favorite Technique and/or Products
Simon Says Stamp Monday Challenge Don't Cut, Just Paste
Crafting Muskateers #26 Shades of Summer
Addicted to Stamps Challenge #106 Summer Colours


INGREDIENTS
Papers:  White CS (Staples, 110#), More Mustard CS (Stampin' Up!), Very Vanilla (Stampin' Up!), More Mustard Patterned DSP/Regals Stack (Stampin' Up!).
Inks:  More Mustard (Stampin' Up!), Early Espresso (Stampin' Up!), Glossy Accents (Ranger), Gold Glow Spritzer (Stampin' Up!), Gold Pigment (Colorbox).
Enamels/Powders/Glitters:  Detail Gold Emboss Enamel (Personal Stamp Exchange), Gold Ultra-fine Jewel Glitter (Mark Enterprises).
Stamps:  Elements of Style (Stampin' Up!), Urban Grunge by Tim Holtz (Stamper's Anonymous), Baroque Motifs (Stampin' Up!), Artistic Etchings (Stampin' Up!), French Script (Stampin' Up!), Vintage Vogue (Stampin' Up!), Tiny Tags (Stampin' Up!), French Foliage (Stampin' Up!), Silhouette Sentiments (Stampin' Up!),
Big Shot/Cuttlebug:  Vintage Wallpaper Emboss Folder (Sizzix/Stampin' Up!).
Cricut:  Sweet Treats.
Punches:  1/16" Circle (Stampin' Up!), 1/8" Circle (Stampin' Up!), 2-step Bird (Stampin' Up!), Small Oval (Stampin' Up!).
Embellishments:  More Mustard Satin Ribbon (Stampin' Up!), Gold Cord (Recollections), Adhesive Pearls (Jewelry Essentials), Brights Candy Dots (Stampin' Up!).

Sunday, June 14, 2015

Flying Insect Collection in the Spring Garden Card


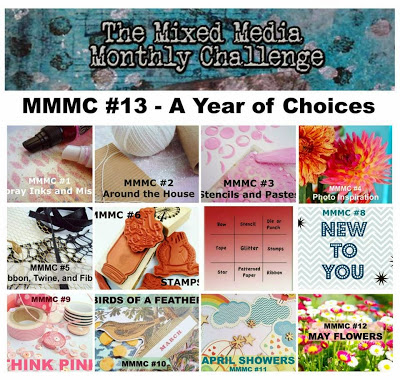
I created all of the garden's and bugs' various details for the Mixed Media Monthly Challenge, a blog that is celebrating its first anniversary of challenges.  I tried to incorporate as many of the previous year's challenges as possible.  The following is the set of options I utilized:  spray inks and mists, around the house, photo inspiration (use of yellow, orange and green...pink in the form of an intense magenta created by using cherry colored cardstock that was transformed by Ranger brand's "Glossy Accents"), fiber/raffia, stamps, Tic Tac Toe (grid challenge:  punch, stamps, ribbon/raffia), New to You, April Showers (Splatter stamp on card base), and May Flowers.
 

DCWV produced the insect background cardstock, and I fussy-cut each of the bugs that have the three-dimensional appearance, inked the backs and sides in a coordinating caramel color, then added Glossy Accents to the bodies to create some dimension.  Glossy Accents was also used as the adhesive to help hold the positions of the wings, to glue the bugs to the garden area, and to adhere each insect to its original image on the cardstock.  This was layered on a corner-rounded, darker cardstock and placed onto a base that I stamped, sponged, and used a spritzer tool to add ink to it. 

Cricut's "Plantin Schoolbook" cut the grass and flowers.  Grass blades were snipped more, vertically.  Some edges were inked.  The pieces were then corrugated.  I snipped the flowers, embellished them with candy dots, punched CS circles and inks.  Glossy Accents were added for texture, to create a seal, and as an adhesive.  New to me:  using Ranger's "Glossy Accents" as an adhesive and maintain an object's structure.  The branches were punched, spritzed in a homemade alcohol ink (new to me), sponged, and coated in Glossy Accents. 

After I finished submitting my card for the Mixed Media Monthly Challenge, I found that my project needed more attention.  I added more insects and made a few tweaks to improve the piece's overall appearance.  Once everything dried, I packaged the card in a clear cellophane bag, and tied it closed with natural raffia.  Finally, I was pleased with the finished product..in fact, I was delighted by it--and also delighted to find a small set of additional challenges for which to submit this "Flying Insect Collection in the Spring Garden Card."  Please find their respective information below:   

Challenges/Links
Mixed Media Monthly Challenge #13 A Year of Choices and Some Changes
Petal Lu Challenge for June 15, 2015 Lacy Sunshine:  Anything Goes
Inkspirational Challenge #84:  Photo Inspiration
Just Us Girls Challenge Trend Week #297:  Stacked Die Cuts


Card Ingredients
Papers:  Dark Romance Stack (DCWV), Cream CS (Staples, #110), Cherry Cobbler CS (Stampin' Up!), Mud Pie Textured CS (Bazzil Basics Christmas Stack for My Mind's Eye Signature Christmas), Old Olive CS (Stampin' Up!), Creamy Caramel Textured CS (Stampin' Up!), More Mustard (Stampin' Up!).
Inks:  Creamy Caramel (Stampin' Up!), Really Rust (Stampin' Up!), Glossy Accents (Ranger), Early Espresso (Stampin' Up!), Chocolate Chip (Stampin' Up!), Homemade Alcohol Ink Spritz (Garden Green by Stampin' Up! and More Mustard by Stampin' Up!), Pumpkin Pie (Stampin' Up!), Old Olive (Stampin' Up!).
Stamp(s)/Set(s):  French Foliage (Stampin' Up!), Delight in Life (Stampin' Up!).
Punches/Tools:  Corner Rounder (Marvy Uchida), 2-Step Bird (Stampin' Up!), 1/4" Circle (Staples ?), 1/8" Circle (Stampin' Up!), Corrugator (Stampin' Up!), Spritzer (Stampin' Up!).
Cricut Cartridge(s):  Plaintin Schoolbook.
Embellishments:  Brights Candy Dots (Stampin' Up!), Antique Brad (Stampin' Up!), Natural Raffia (Wrap It Up!).

Friday, May 29, 2015

Irridescent Purple and Blue Love Card


This love theme card was designed to reflect irridescence, glitter, dry embossing and plenty of bling.

Challenges/Links
Inkspirational Challenges #83 Purple and Love 
Sunday Stamps Weekly Challenge for May 24, 2015 - June 5, 2015
Cuttlebug Mania Bling
Crafty Hazelnut's Patterned Paper Monthly Challenge May 2015
Mixed Media Monthly Challenge #12 May Flowers
Fan-Tastic Tuesdays #87 Add Some Texture
Crafting When We Can Challenges #95 Bling It Up

Card Ingredients
Papers:  Elegant Eggplant Patterned DSP (Regals Pattern Pack by Stampin' Up!), Seawater Textured CS (Bazzil Basics for BasicGrey "Deck the Halls"), Elegant Eggplant Textured CS (Stampin' Up!).  
Inks:  Watermark (VersaMark), Elegant Eggplant (Stampin' Up!), Almost Amethyst (Stampin' Up!), Lavender Lace (Stampin' Up!), Eggplant Envy (Stampin' Up!).
Enamels/Powders:  Transparent Enamelware Emboss Powder (Stamp-N Stuff), White Diamond Emboss Powder (Judi King), PearlEx Powder #680 Duo Red-Blue (PearlEx for Stampin' Up!).
Paints:  #72 Frost White All-Purpose Shimmer (Fantast/x for Stampin' Up!).
Stamp(s)/Set(s):  Tiny Tags (Stampin' Up!), Heart Punch Potpurri (Stampin' Up!).
Punches:  Corner Rounder (Marvy Uchida?), 1/16" Circle (Stampin' Up!), Dotted Scallop Ribbon (Stampin' Up!), Medium Jewelry Tag (Stampin' Up!).
Cuttlebug/Big Shot:  Fashionable Hearts Embosslits (Sizzix for Stampin' Up!), Spring Flowers Emboss Folder (Sizzix for Stampin' Up!)
Embellishments:  Silver Cord (Recollections/Michael's), Lavender Bling (Recollections/Michael's), Royal Purple Bling (Recollections/Michael's), White/Clear Bling (Recollections/Michael's), 1/8" Mauve Satin Ribbon (Offray), 1/8" Blue Satin Ribbon (Offray).

Sunday, May 24, 2015

Cajun-Blues and White Bokeh Flora and Fauna Birthday Card


This card contains a new technique (to me)--the Bokeh effect, one that was core to a challenge held at House of Cards.  The technique seemed a little daunting; but once I watched a few YouTube tutorials by other card makers, this project held quite a bit of fun and more self discovery. 

I may actually try to apply the technique to other cards...especially Shabby Chic ones; but I must first consider how the colors can yield new ones...and hopefully not ugly combinations.  There is plenty of warning against such a thing, all over YouTube and craft blogs.  The colors I utilized were based upon a challenge over at "Inspired by Stamping."  Well, now that the card is completed, I can share (and may see) that burnt orange, rust, navy blue and medium-light blue played together nicely.  They provided the gift of a secondary color palette:  one containing hues of salmon and rose.  What a delightful discovery!  Below, please find a complete list of challenges into which I have entered this card, followed by its ingredients and construction process.

Challenges/Links
Mojo Monday Card Sketch Challenge #398
House of Cards May Challenge Bokeh Effect
Simon Says Stamp Wednesday Challenge Anything Goes, Stencil It
Inspired by Stamping Monthly Challenge #94 Stripes and Color Scheme
Seize the Birthday Anything Goes Birthday
On a Stampage Mynette Kitchen's Birthday Bash Givaway:  BLOG CANDY!!!
Penny Black and More Dies and Punches w/Hand Stamping Focus
Fantasy Stampers Challenge #37 Wings and Things
Through the Craft Room Door Anything Goes
Fab and Funky Challenges #260 Flora and Fauna
The Shabby Tea Room #252 Fun Blooms
Cuttlebug Mania Ribbon
Creatalicious Challenge #75 Butterflies and DT Call
City Crafter Challenge #262, One or More:  Smooching, Stencilling, Splattering, Sponging
Just Us Girls Challenge Week #294 (Colors Scheme)

Card Ingredients
Papers:  Cajun Craze Striped DSP(Stampin' Up! Rich Regals Patterns Pack), Whisper White (Stampin' Up!), Night of Navy (Stampin' Up!), Really Rust CS (Stampin' Up!), Night of Navy Polka Dot DSP (Stampin' Up! Regals Patterns Pack).

Inks:  Bliss Blue (Stampin' Up!), Night of Navy (Stampin' Up!), Frost White Pigment (ColorBox), Brocade Blue (Stampin' Up!), White Opaque Embossing Powder (Stamp-N Stuff), Cajun Craze (Stampin' Up!), Blush Blossom (Stampin' Up!), Really Rust (Stampin' Up!).

Stamp(s):  Daisy Field Stampin' Around (Stampin' Up!), Elementary Elegance (Stampin' Up!), Carte Postale (Stampin’ Up!), Punch Potpurri (Stampin’ Up!), Tiny Tags (Stampin’ Up!).

Punches:  1/4" Circle (Stampin' Up!), 1/2" Circle (Stampin' Up!), 1" Circle (MarvyUchida), 3 Flowers Punch (Stampin’ Up!), Boho Blossoms (Stampin’ Up!), 2-Step Owl (for circles; Stampin' Up!).

Cuttlebug/Big Shot:  Circles #2 Die (Sizzix), Square Lattice Emboss Folder (Sizzix for Stampin' Up!), Make-a-Bow Die (used for circles; Sizzix).

Stencil:  Homemade (using punched cardstock), containing a variety of circle sizes from dies and punches. 

Embellishments:  3/16” Orange Satin Ribbon (Offray), 3/16” White Satin Ribbon (Offray).

Process
Layout:  Mojo Monday #398.

Base:  Navy blue CS cut and folded to 5-1/2" x 4-1/4".

Layer 1:  5-1/4" x 4" white CS.  Bokeh effect created for challenge by using sponging techniques, using blues and oranges to satisfy color challenge requirement.  Laid homemade circles stencil on sponged CS and re-sponged inside circles using white pigment ink.  Allowed to dry; sponged edges.  Randomly stamped birds, butterflies and floral sprays.

Layer 2:  5-1/4" x 1" Cajun Craze striped DSP to satisfy "stripes" challenge.  Used spritzer with dark blue and burnt orange markers to create splatter effect.  Used same inks and their hues to randomly stamp small butterflies and miniature birds; lightly sponged edges.  Adhered along upper edge of Layer 1.

Layer 3:  Cut three strips of ribbon in two colors that were part of the aforementioned color challenge.  Adhered them in alternating patter to Layer 1, slightly overlapping Layer 2, and folder over the back. 

Layer 4:  Punched flower components and manual embossed using square lattice emboss folder.  Used pop-up dots to adhere one flower to the end of each piece of ribbon.

Layer 5:  4" x 1" Really Rust CS stamped with rolling stamp of daisies in navy ink.  Used a rust colored marker to color the center of each flower.  Manually embossed using square lattice emboss folder.  Sponged borders in burnt orange-hued ink.  Adhered to card.

Layer 6:  4-1/2" x 3/8" (approximate) Night of Navy polka dot paper; cut ends to create flag/banner look and glued it to Layer 5.

Layer 7:  Used Circles #2 die and navy CS to create outer circle; sponged rim with matching ink.

Layer 8:  Punched circle of white CS.  Re-created Bokeh Effect as in Layer 1.  Stamped small hollow circles in medium-light blue ink.  Enamel embossed sentiment.  Sponged rim and glued to Layer 7.  Used adhesive 3-dimensionals to adhere to Layers 5 and 6.

Sunday, May 17, 2015

Shabby Chic Vintage Flower And Butterflies Birthday Card


How often does a finished card appear significantly different than the original plan?  It seems to be happening more often with me these days, and its an enlightening set of experiences.  A journey of discovery...one in which the true nature of who I am has been revealed in what, given my background, exists as an unlikely medium:  paper crafting.

I am naturally a "detail person," and my paper crafting is not only reflecting this core characteristic, but I am realizing that it is perfectly okay.  Finally, I have found a community of people that either share this trait or they delight in what this type of artwork contains and conveys. 

Another revelation I have had with this card is how much I like shabby chic and vintage themes...not all aspects of vintage, but most.  I like how rich, bold colors can be distressed, muted, sponged in coordinating and/or contrasting colors and embossed to convey a completely different feeling.  I love how they can have adornments that were mere scraps the moment before adding to the card and convert it to something so rich.  Its like a Cinderella story with every card or art piece that is made.

I have my own Cinderella story, but that is to be saved for another time; however, not long after I met my prince charming, the embossing technique became part of my crafting life.  At first it was solely using a corrugator, then it was embossing folders followed by emboss resist.  The use of enamels would not come with much confidence and fluency until several years later.  Embossing of all types has become my favorite family of techniques. 

My "Shabby Chic Vintage Flower...Card" has butterflies that were cut and embossed with an embosslit created by Sizzix for Stampin' Up!:  "Beautiful Wings."  I used a corrugator for the banners in the upper left corner.  The large flower was die cut and embossed using Sizzix "Flower Folds."  Then, I enamel embossed the flower petals and edges of the first layer to create a satin-finished brushed-paint look.  

If you have a chance to visit "The Mixed Media Monthly Challenge," you'll find that May is the month of flowers.  The submissions of two team members seemed to compiment my style and reflect characteristics of this card:  flowers, subsued colors, and a variety of components that keep the viewer engaged.  I am a new follower of the blog and look forward to seeing many mixed media pieces to inspire me in the future.

Please read the "Process" section further down in my post for detailed information on how I created this card.  Challenges entered and card ingredients also follow:

Challenges/Links
Petal Lu Challenges Anything Goes
The Mixed Media Monthly Challenge #12 May Flowers
Beyond Grey Challenges #68 Make Your Own Embellishment (I made the Shabby Chic Flower.)
Mojo Monday #397 (Sketch)
Inkspirational Challenge #82:  Three of Four--Distressing, Flowers, Embossing, Pearls
Fan-tastic Tuesday Chalenge #85 Anything Goes with some Flowers
Mixed Media World Challenge #3 Vintage
Wags 'n Whiskers Stamps Challenge #154 Lots of Layers
Craft for the Craic Friday Mid-Month Inspiration Wings
2 Crafty Girls Challenge Blog #3 Vintage
Cuttlebug Mania Ribbon
Creatalicious Challenges #75 Butterflies
Creative Card Crew #87 Embossing Wet or Dry
Deep Ocean Challenge Blog # 103 Flowers
City Crafter Challenge Blog Wee #261 Focus on Flower(s)
Crafting By Designs Flowers
Verge Stamps Inspiration Challenge Let it Bloom
Papertake Weekly In The Garden
The Crafter's Cafe Challenge Blog #116 Feminine
Pile It On Challenge #69 Not Cute
On a Stampage Mynn's Birthday Bash Giveaway Celebration! (BLOG CANDY!)

Card Ingredients
Papers: Fawn/Lt. Brown Textured CS (Bazzil Basics Christmas (Designed for My Mind's Eye Signature Christmas)), French Vanilla/White Textured CS (Bazzil Basics Christmas (Designed for My Mind's Eye Signature Christmas)), Pink Pirouette CS (Stampin' Up!), Soft Suede CS (Stampin' Up!).

Inks: Tinted Emboss (Top Boss), White Opaque Emboss Powder (Stamp-N Stuff), Creamy Caramel (Stampin' Up!), Soft Suede (Stampin' Up!), Watermark (VersaMark), Chocolate Brown Opaque Emboss Powder (Stamp-N Stuff).

Stamp(s): Victorian Lace Background (Stampin' Up!), Elementary Elegance (Stampin' Up!).

Punches: 1" Circle (Marvy Uchida), Dotted Scallop Ribbon Border (Stampin' Up!), 3/4" Square (Stampin' Up!), Corrugator (Stampin' Up!), 1/16" Hole (Stampin' Up!), Paper Piercer (Stampin' Up!), 1/8" Hole (Stampin' Up!), 2-Step Bird (Stampin' Up!).

Cuttlebug/Big Shot: Flower Folds Bigz XL Die (Sizzix/Stampin' Up!), Beautiful Wings Embosslit (Sizzix/Stampin' Up!), Circles #2 Die (Sizzix).

Embellishments: 1/8" Vanilla Cream Satin Ribbon (Offray), Flower Neutrals Brads (Stampin' Up!), Basic Adhesive Pearls (Stampin' Up), Antique Brads (Stampin' Up!), Gold Cord (Recollections/Michael's).

Process
Layout: Mojo Monday #397.

Base: Folded to 4-1/4" x 5-1/2".

Layer 1: 4" x 5-1/4", fawn brown CS. Stamped background, sponged, enamel embossed edges for brushed, satin-finished paint look.

Layer 2: 2-1/4" x 5-1/4", pink CS. Stamped background, sponged, distressed edges. Adhered to Layer 1.

Layer 3: Cut two solid and differing-colored pieces of CS to size; use square punch to create end of banners/flags. Sponge, adhere to layer, used corrugator. Glue unit to Layer 1 (after Layer 2 has been adhered to it) and punch two holes for brads. Apply adhesive pearls to center of flower brads; push brads through holes to back.

Layer 4: Punched CS to create dotted scallop ribbon, sponged, glued 1/8" ribbon down center. Adhere entire piece to already attached layers 1 and 2.

Layer 5: Using "Flower Folds," manual die cut 3 layers of pink CS. Sponge in Soft Suede. Adhere at center, displaying all petals. Punch circle of Soft Suede CS and glue to center; once set, punch/pierce hole in center. Enamel emboss outer parts of petals for brushed paint effect. Insert antique brad in center of flower; place a ring of adhesive pearls along brad's outer rim.

Layer 6: Vanilla white CS punched and enamel embossed sentiment in brown. Sponge rim with Soft Suede brown ink. Manually die-cut larger circle form Soft Suede CS; sponge rim with matching ink and glue sentiment piece onto center of it. Adhere to card using dimensionals.

Layer 7: Butterflies manually die-cut in two colors of CS and sponged. Gold cord double-wrapped around vertical center of largest butterfly and tied to create antennae. Attach adhesive pearls to smaller butterflies.  Add all to Layers 2 and 1. Smallest butterfly glued to inner circle of Layer 6, below sentiment.

Layer 8: Punch branches from CS, using two-step bird punch. Cut to appropriate length and glue to areas coming from beneath the large flower.

Sunday, May 10, 2015

Carte Postale Bonjour Weathered Fleur De Lis Card


During one of my craft haul jaunts a couple of years ago, I came across Cuttlebug's/ ProvoCraft's "Fleur De Lis" embossing folder, on sale and with an extra percent off due to a coupon...SCORE!  I could not wait to use it, but life had other plans and paper crafting came to a near halt.

Fast forward to May 2015:  I have re-launched and re-named my blog (See original post here:  Blog Re-launch and a Masculine Equestrian-Kind Birthday Card for my Uncle) and am crafting each week.  My perspective is different.

Historically I maintained the perspective of a well-seasoned, former, corporate marketing executive who has been expected to produce big results with high intensity.  I felt rushed, trying to do too much at once...and there was no joy in that.  Now, paper crafting has become truer to what it should be--an artform...one in which I have been able to release an improved and more special product.  The lack of self-imposed pressure has (finally) made this hobby on of a higher level of enjoyment as well.

Below, please find a list of challenges to which I have submitted my card.  I have also included my card's recipe (ingredients and process) afterward.  

Challenges/Links
Mojo Monday #396 Contest and Giveaway
Simon Says Stamp Wednesdays Let's Get Sentimental (Feat. Tim Holtz)
Cuttlebug Mania We Love to Stamp (Feat. Manual/Cuttlebug Embossing/Die Cuts)
Penny Black and More Die and Punches
Creatalicious Challenges Embossing Wet or Dry

Card Ingredients
Papers:  Crystal Clear Shrink Film (Shrinky Dinks/K&B Innovations), Silver CS (Recollections/Michaels), Vancouver Dark Grey Textured CS (Bazzil Basics), Rich Razzleberry CS (Stampin' Up!), Black CS (Recollections/Michaels), Silver CS (Stampin' Up!).

Inks:  Tinted Emboss (Top Boss), Jet Black (Staz-On), Silver Powder (Stamp Affair), Bold Black Detail Powder (Stampin' Up!), Silver Ultimate Metallic (Encore/Tsukineko), Silver/Black Foil Smootch Spritz (Stampin' Up!), Rich Razzleberry (Stampin' Up!), Going Grey (Stampin' Up!).

Stamp(s):  French Market (Tim Holtz Visual Market/Stamper's Anonymous), Carte Postale (Stampin' Up!), Urban Grunge (Tim Holtz Visual Market/Stamper's Anonymous), Artistic Etchings (Stampin' Up!), French Foliage (Stampin' Up!).

Punches:  Fleur-de-Lis (Martha Stewart),  1/4" Hole (Source Unknown), 1-3/8 Hole (Stampin' Up!), Small Oval (Stampin' Up!).

Cuttlebug/Big Shot:  Fleur De Lis Emboss Folder (Cuttlebug/ProvoCraft),

Cricut:  Sophisticated (Teresa Collins/ProvoCraft), Accent Essentials (ProvoCraft).

Embellishments:  Fleur De Lis Cabachon w/Bling (Jolee's Boutique/EK Success), Silver Tassel (Spare Parts/The Paper Studio/Hobby Lobby).

Process
Layout:  Mojo Monday #396.

Base:  Folded to 4-1/4" x 5-1/2".

Layer 1:  4" x 5-1/4", two types of CS cut diagonal.  Embossed w/Fleur De Lis folder through Cuttlebug.  Rolled emboss ink onto CS and added powder to heat and create enamel finish in contrast colors.  Adhered to card.

Layer 2:  2-1/4" x 3", black CS.  Stamped "Carte Postal" image (Tim Holtz, not Stampin' Up!, despite the set's name) and enamel embossed.  Two overlays of argyle from Cricut; adhered and spritzed, then glued to panel.

Layer 3:  1-3/8" grey circle (punched); stamped in two colors with different images (argyle and French script), adhered to larger black CS circle base and spritzed as a single unit.

Layer 4:  Small oval stamped w/sentiment and sponged w/complimentary color along rim.  Layered onto circle w/dimensionals. 

Layer 5:  Paris postmark created by placing a small heap of silver emboss powder onto CS and heating it from underneath.  Carefully pressed postmark stamp into melted emboss enamel and allowed to cool for a few seconds and pulled up slowly.  Cut out post mark and adhered to "Vancouver" grey, stamped circle.

Layer 6:  Two-part fleur de lis using punched image, sponged with Staz-on ink; added emboss powder and melted; done three times.  Sprinkled a few grains of black detail emboss powder and re-melted; then allowed to cool to create a weathered look.  Glued fleur de lis sticker on top.  Used dimensionals to add to argyle layer and overlap circles.

Layer 7:  Cut top loop of tassel and frayed it.  Created charms using stamped images onto shrink film allowing for a loop above each picture.  Used frayed strings from tassel to tie the three charms to top of the unit.  Glued entire thing to top of card.

Sunday, May 3, 2015

Navy, Raspberry and Pink Watercolor Flowers Card for May 2015

 
I just purchased the new "Spring Flowers" embossing folder, made by Sizzix for Stampin' Up!  I could hardly wait to get it and see how well it would work with a couple of much older watermark and open flower stamps I've reserved in my crafting collection.  After using the folder on cardstock, I used a brayer with some navy colored ink and gently rolled it across the raised flowers.  The background cardstock was stamped with French script, polka dots, and flowers, then I sponged the piece to tone down the brightness and help bring the colors together.  The vertical, narrow strip of white cardstock was treated in a similar manner.  I enjoy embellishing embellishments (a tongue twister!), so I added some bling to the center of the flower brad to tie-in to those found on the dragonfly cabachon.  The following card serves as the finished product:


Challenges/Links
613 Avenue Create #122 Anything Goes:  Create Something Feminine
Mojo Monday  #396 Tall and Skinny
Simon Says Stamp Wednesdays Anything Goes
Sothern Ridge Trading Company Spring

Card Ingredients
Papers:  Whisper White DSP (Stampin' Up!), Regal Rose CS (Stampin' Up!), Rich Razzleberry CS (Stampin' Up!), Pink Pirouette CS (Stampin' Up!), Night of Navy CS (Stampin' Up!), Regals Patterns Stack DSP in Night Navy (Stampin' Up!).

Inks:  Rose Romance (Stampin' Up!), Rich Razzleberry (Stampin' Up!), Not Quite Navy (Stampin' Up!), Night of Navy (Stampin' Up!).

Stamp(s):  French Script Background (Stampin' Up!), Polka Dots Background (Stampin' Up!), Fast Flowers (Stampin' Up!), Watercolor Joy (Stampin' Up!).

Punches:  Medium Scallop Circle (Stampin' Up!), 1/8" Circle (Stampin' Up!), 2-Step Bird (Stampin' Up!), Crimper (Stampin' Up!).

Cuttlebug/Big Shot:  Spring Flowers Emboss Folder (Stampin' Up! by Sizzix).

Embellishments:  Dragonflies Cabachons (Jolee's Boutique by EK Success), Bling Rhinestones (Recollections for Michael's), 5/8" Navy Organdy Ribbon (Sheer Creations for Michaels), Flower Regals Brad(s) (Stampin' Up!)

Friday, May 1, 2015

Blog Re-launch and a Masculine Equestrian-Kind Birthday Card for my Uncle


Years have passed since my last blog post, so I decided to renew my efforts and re-launch this spot with a new name.  It used to be "Stamping Spot of the Lily Lover."  I shared some of my crafts but none of my vibrant daylilies and elegant calla lilies.  They just did not seem relevant to my paper crafting, and after doing any sort of gardening, there was nothing left of me saved for crafting and blogging.

My family has been encouraging me to re-start my blogging efforts, so my children and husband joined me in creating a new, more relevant name for the blog.  I was holding my small dog, a brussels-griffon, when my husband jokingly said, "Rock, Paper, Scissors!"  I was sure that the name was taken; and, besides, what was I going to do with a rock?  Throw it when one of my craft projects did not work out well?  Paint it and treat it like the infamous "Pet Rock" fad of a by-gone era?  A safer option versus the more stress-relieving toss idea...but it sure would not help comfort me when a project went from beautiful to dreadful.

However, my dog, "Stella" (a/k/a:  Stella Monster) has been a great comfort to me over the years.  She has been a loyal, unconditionally-loving, and attentive member of my family; but, everybody knows that she has been the most attached to me since the day we brought her home.  So, it just seemed natural to rename the blog, "Dog, Paper, Scissors," and this card is the first product of it:

Challenge Submission(s)/Link(s)
1.  Simon Says Stamp Wednesdays Anything Goes
2.  Party Time Tuesdays Anything Goes 
3.  Sister Act Card Challenge Anything Goes 
4.  Creatalicious Challenges Embossing Wet or Dry 
5.  4 Crafty Chicks Challenge Blog Anything Goes 
6.  Crafty Hazelnut"s Patterned Paper Challenge Patterned Paper

Card Ingredients
Papers:  Well Worn DSP (Stampin' Up!), Cream CS (Staples #110), Creamy Caramel CS (Stampin' Up!), Chocolate Chip CS (Stampin' Up!), Cajun Craze CS (Stampin' Up!).

Inks:  Chocolate Brown Embossing Powder (Stamp-N Stuff), Timber Brown (STAZ-ON), Early Espresso (Stampin' Up!), Soft Suede (Stampin' Up!), Creamy Caramel (Stampin' Up!), Chocolate Chip (Stampin' Up!), So Saffron (Stampin' Up!), Dusty Durango (Stampin' Up!).

Stamp(s):  Out West (Stampin' Up!), Baroque Motifs (Stampin' Up!).

Punches:  1/8" Circle (Stampin' Up!), Small Oval (Stampin' Up!).

Cuttlebug/Big Shot:  Leaves #2 Die (Sizzix), Woodgrain Emboss Folder (Tim Holtz Alterations by Sizzix), Square Lattice (Stampin' Up! by Sizzix)

Embellishments:  Beige/Natural Raffia (Scrap--Source Unknown)